AWS ABCs: Granting A Third-Party Access to Your Account

There can be times when you're working on the AWS Cloud where you need to grant limited access to your account to a third-party. For example:
- A contractor or a specialist needs to perform some work on your behalf
- You're having AWS Professional Services or a partner from the Amazon Partner Network do some work in your account
- You're conducting a pilot with AWS and you want your friendly neighborhood Solutions Architect to review something
In each of these cases you likely want to grant the permissions the third-party needs but no more. In other words, no granting of AdministratorAccess policies because it's easy and just works. Instead, adherence to the principle of least privilege.
This post will describe two methods—IAM users and IAM roles—for proving limited access to third-parties.
Comparing the Two Approaches⌗
The big difference with the IAM user approach vs the role-based approach is the way the credentials for each entity are handed out.
IAM users have long-term credentials that only change by a manual action (either the user or an administrator changes the credentials). Those credentials will continue to provide access to the account until they're either changed or the user is disabled/deleted.
By contrast, roles don't have long-term credentials. When a principal assumes a role, it makes an API call to a service called the Security Token Service (STS). STS validates the principal's credentials and validates it has permission to assume the requested role. If everything checks out, STS returns temporary credentials which allow use of the role.
The temporary credentials are time-limited and after they expire, they are done; they will no longer work and the principal will have to go through the process of calling STS and getting new credentials. This model enforces credential rotation on a relatively frequent basis which helps you adhere to security best practice.
IAM User⌗
When you sign up for an AWS account, you provide an email address and a password. Those credentials become the root user credentials. Root is all powerful. The Identity and Access Management (IAM) service allows creating discrete user logins which can be assigned to individuals and granted just the permissions they need; everything from no or very limited permissions all the way up to administrator access. Because an IAM user's access is fine-grained, it's best practice to always use an IAM user instead of the root credentials for day-to-day activities.
IAM can be set up to federate login identities with a SAML 2.0 provider such as Active Directory Federation Services. In this configuration, usernames and passwords live in the identity provider's database and management of usernames, passwords, and permissions is largely done in the identity provider's console. This post isn't going to go into details of managing permissions when using federation and will instead focus on managing login credentials in IAM's own database.
Create a new IAM user with fine-grained permissions by following these steps:
- Log into the AWS Console using login credentials that grant you administrator access
- Browse to the IAM service
- Choose Users and click Add user
- Type a username for this user
- Select the type of access to grant this user: either Programmatic access (i.e., access to AWS APIs), AWS Management Console access (i.e., access to the web-based AWS Console), or both
- If you chose Management Console access, you'll have to provide a password (or let the AWS Console generate one for you)
- Click Next: Permissions
This is the crucial part of creating the account: the part that defines what the user has permissions to do in the AWS Cloud. There are multiple options here:
- Add user to group - Users can be grouped together and have their permissions managed as a group. If you don't have groups and permissions setup in this way, keep reading.
- Copy permissions from existing user - This is handy if you want to mimic an existing IAM user's permissions. If you don't have an existing user you can copy from, keep reading.
- Attach existing policies to user directly - When the above choices don't work, this one is what you need and what I'll describe more below.
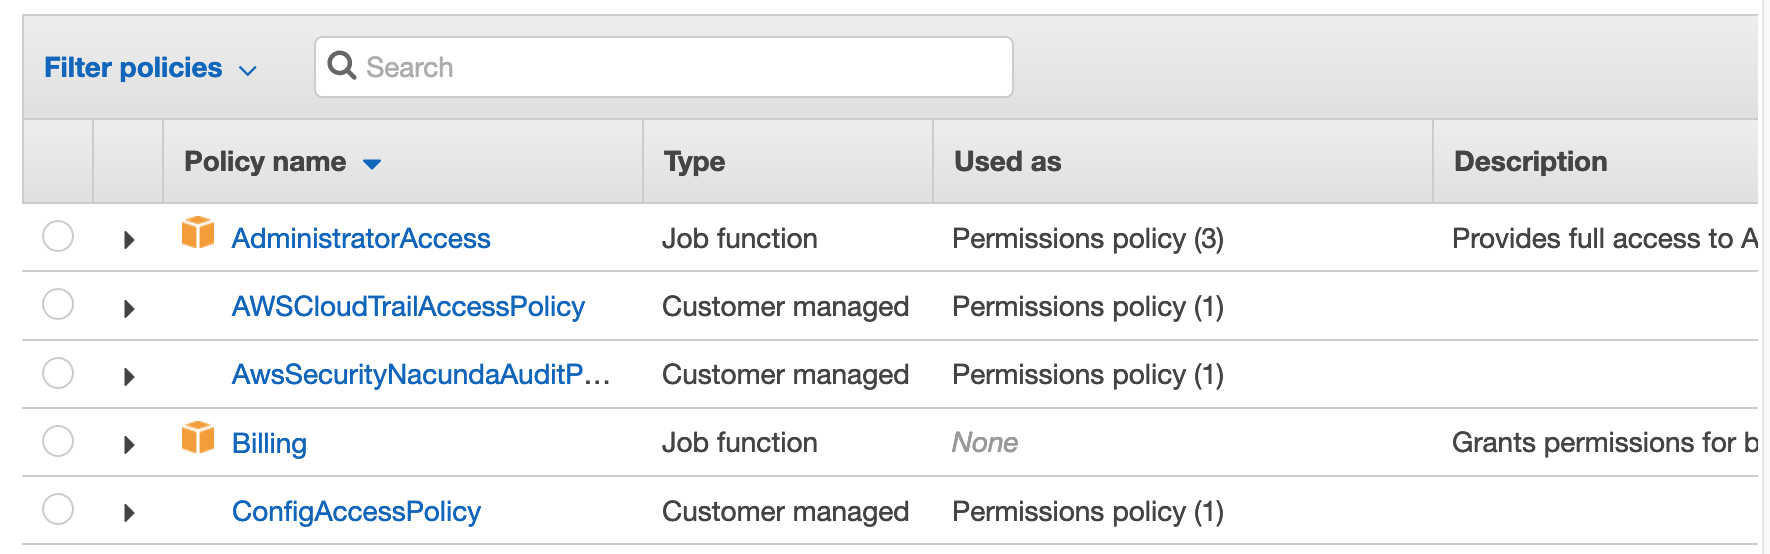
AWS provides a set of pre-built managed policies which you can browse by clicking on Policies in the IAM Console. The policies with the orange AWS block logo beside them are the AWS managed policies. Some of the more interesting ones for the purposes of this post are:
- ReadOnlyAccess - Can view everything but not create, update, or delete anything.
- PowerUserAccess - Can create, read, update, and delete anything, except for IAM and AWS Organization resources.
- AmazonS3ReadOnlyAccess - Can view S3 buckets and their contents
- The list goes on...
Getting back to creating the IAM user:
-
Find the policy that best matches the type of permissions you want to grant to the third-party; use the search box and type words like
power,readonly, orec2to narrow down the list. - Click Next: Review
- Click Create user
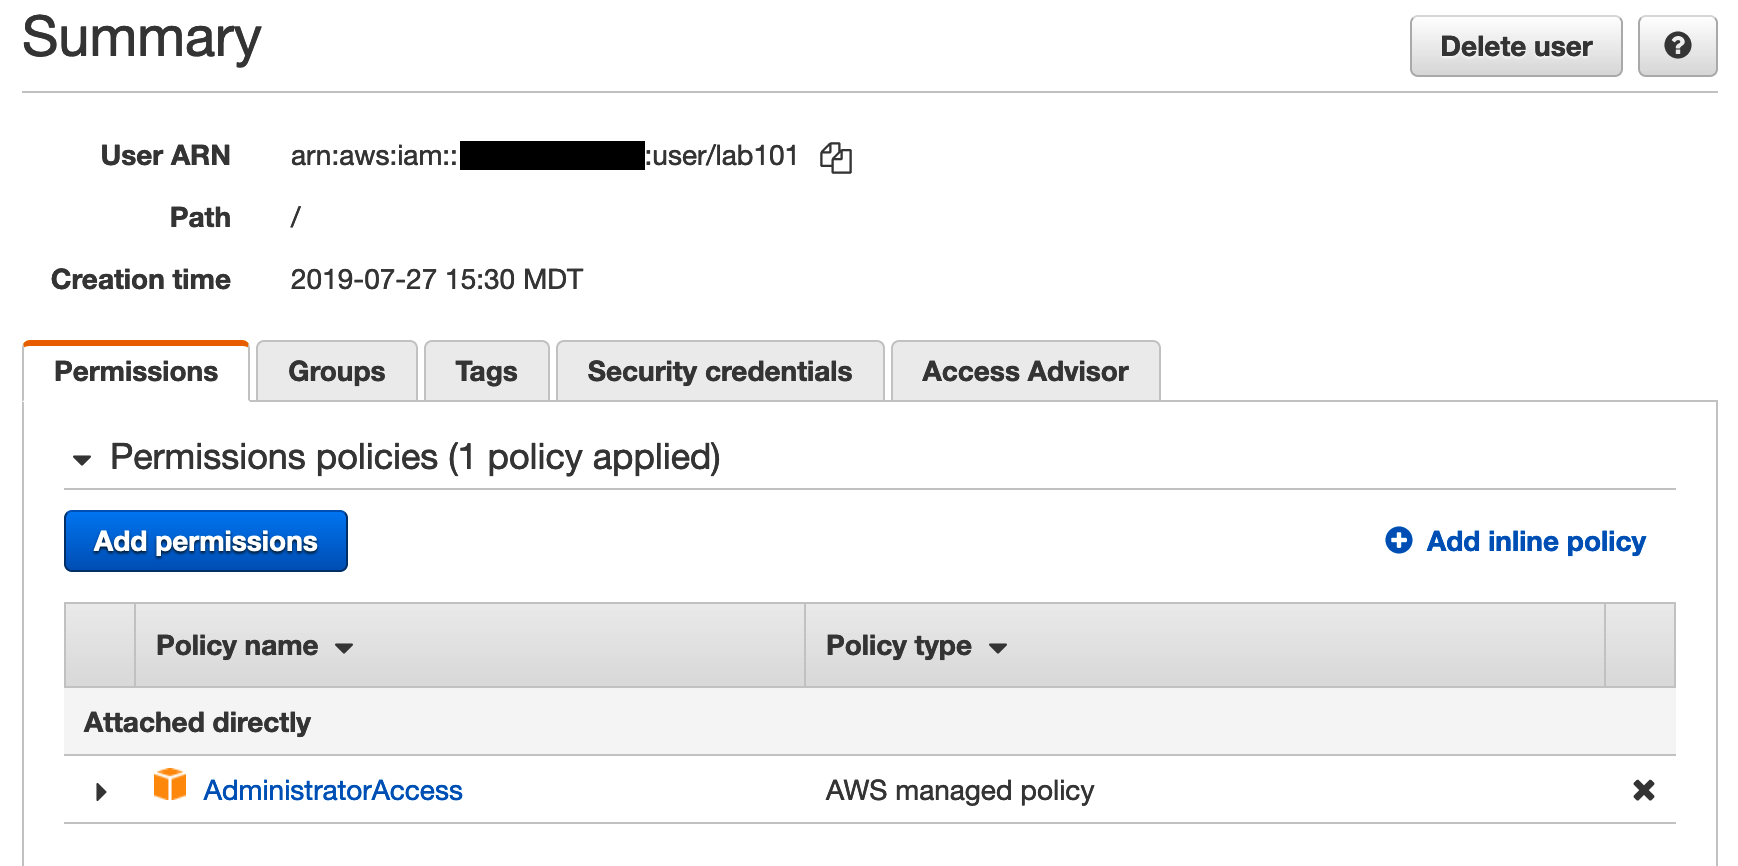
You now have a limited permission user ready to go.
To modify the user's permissions, click on the username in the Users section of IAM and click the Permissions tab. Add more permissions by clicking on Add permissions and remove permissions by clicking on the X beside the permission policy you want to remove.
For a more advanced exercise, use the IAM Documentation to learn how to create a custom policy which provides exactly the right permissions to just the services and API calls the third-party requires.
IAM Roles⌗
Roles in IAM are a set of permissions that grant access to the AWS Cloud. The permissions are assigned to the role and not a particular IAM user or group. Principals—such as an IAM user—can then assume the role and adopt the permissions assigned to that role.
A powerful feature of roles is for them to be assumed by IAM users from other AWS accounts. For example, if the third-party you're working with has their own AWS account, you can grant them access to your account by creating a role—with the appropriate permissions—and granting their account permission to assume the role in your account.
Create a new IAM role and grant access to the third-party's AWS account by following these steps:
- Log into the AWS Console using login credentials that grant you administrator access in your account (the account where the work is being performed)
- Browse to the IAM service
- Choose Roles and click Create role
- Choose Another AWS account as the type of trusted entity
- For Account ID, type the 12-digit AWS account ID belonging to the third-party; click Next: Permissions
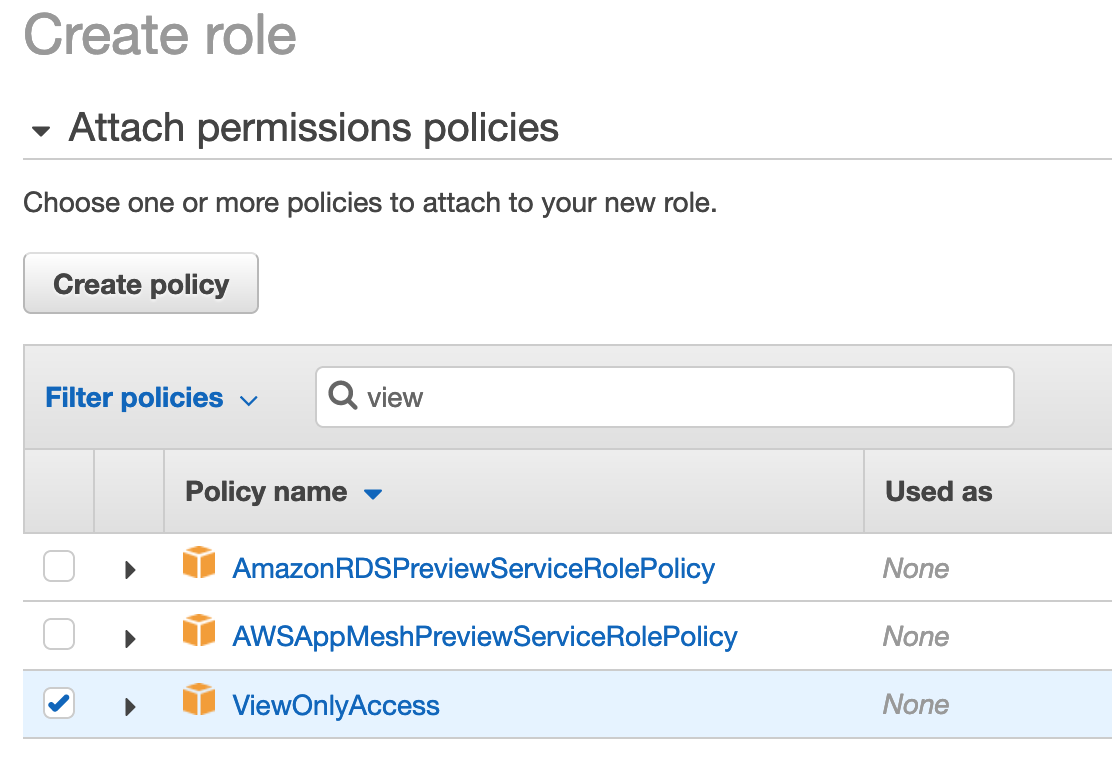
- Attach a permissions policy by either picking an existing policy from the list or clicking to create a new policy. This is where you want to be strict and only assign the permissions the third-party needs to do their work. Use the search box and type words like
power,readonly, orec2to narrow down the list. Click Next: Tags. - Assign tags if you want and click Next: Review
- Give the role a name and an optional description; click Create Role
You've now created a role in your account which the third-party has permissions to assume. On their side, they now need to grant individual users in their account permission to assume this role. Users with AdministratorAccess or PowerUserAccess permissions will already be able to assume the role, but other, less privileged users may not.
Have the third-party follow these steps in their AWS account:
- Log into the AWS Console using login credentials that grant you administrator access
- Browse to the IAM service
- Choose Policies and click Create policy
- Click the JSON tab and paste the following into the editor, overwriting what's already there:
{
  "Version": "2012-10-17",
  "Statement": {
    "Effect": "Allow",
    "Action": "sts:AssumeRole",
    "Resource": "arn:aws:iam::TRUSTING-ACCOUNT-ID:role/TRUSTING-ROLE-NAME"
  }
}
Replace TRUSTING-ACCOUNT-ID with the 12-digit ID of the account where the role was created and TRUSTING-ROLE-NAME with whatever name the role was given in the steps above.
- Click Review policy
- Give the policy a name, an optional description, and click Create policy
- Back in IAM, click Users and click the IAM user to attach the policy to
- Click Add permissions, select Attach existing policies directly, and select the policy you created above from the list; click Next: Review
- Click Add permissions
This combined set of steps enacts a two-way handshake that requires the trusting account to grant permissions to the trusted account and the trusted account to delegate permission to its users to be able to assume the trusting account's role.
At this point the third-party is able to assume the role you created for them and adopt whatever permissions you granted to the role while operating in your account.
When granting access to a third-party using a role, it is often a good idea to specify an External ID to prevent the "confused deputy problem. However, the AWS Console doesn't allow for using an External ID when switching roles, so you will have to decide if use of External ID is suitable for your situation or not. Much more information about using External ID is in the IAM documentation.
References⌗
- Identity and Access Management Users
- Identity and Access Management Roles
- AWS Temporary Security Credentials
- Providing Access to AWS Accounts Owned by Third Parties
Disclaimer: The opinions and information expressed in this blog article are my own and not necessarily those of Amazon Web Services or Amazon, Inc.