Five Functional Facts about TACACS+ in ISE 2.0
The oft-requested and long awaited arrival of TACACS+ support in Cisco's Identity Services Engine (ISE) is finally here starting in version 2.0. I've been able to play with this feature in the lab and wanted to blog about it so that existing ISE and ACS (Cisco's Access Control Server, the long-time defacto TACACS+ server) users know what to expect.
Below are five facts about how TACACS+ works in ISE 2.0.
1 - All Configuration is Centralized in the Device Administration Work Center⌗
The Work Center is a new concept in ISE 2.0 that groups together all the menus and components within ISE that don't relate to network access. The first two work centers are TrustSec and Device Administration, the latter being the one where TACACS+ is configured. Since neither TrustSec nor Device Admin are (directly) related to network access, but they are still major features within ISE, each with their own sub menus and detailed configuration, they've been grouped together in their own Work Center.
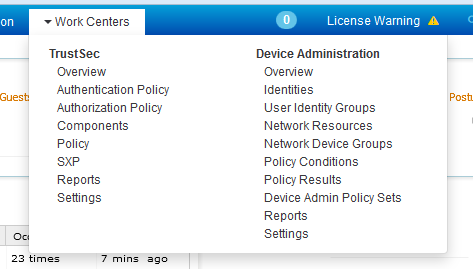
Remember: many places in the ISE UI say "Device Administration" and not "TACACS+". If you're cruising through the UI looking to configure TACACS+, keep your eyes open for menus called "Device Administration". Those are the sections that you want to be in.
2 - Device Admin Policies Use Familiar ISE Objects⌗
When configuring authentication (authc) and authorization (authz) policies for 802.1X or guest access in ISE, objects are created first which represent the network access devices, policy conditions, and policy results. These objects are consumed by policy rules to create the "if <this> then <that>" logic of a rule. For example:
- A network device group object called Downtown_Office
- A condition that checks the validity of an X509 certificate called Check_Certificate
- A result that puts the user in VLAN 40 called Corporate_Access
A network access policy could then say "if <user> is in location Downtown_Office AND Check_Certificate is "true" then grant Corporate_Access".

As I wrote earlier, these objects are reusable which means they can be consumed by a mix of network access and device admin policies. In some cases this wouldn't make sense — like the example of the Corporate_Access result which assigns a VLAN — but in some cases — like checking a location of the network device using the Downtown_Office location — it might.
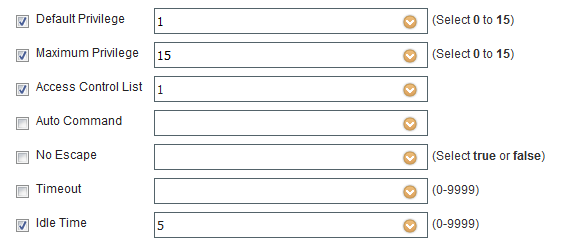
When it comes to device admin policy results, they are created in the Device Admin Work Center and are responsible for defining things like max privilege level, idle timeout, and commands the user is allowed/not allowed to run. I cover this more in fact #4.
3 - Device Admin Uses Its Own Policy Set⌗
As I wrote in fact #1, all Device Admin configuration is done in the Device Administration Work Center and that includes the policy set(s) that make up the authc and authz rules within ISE.
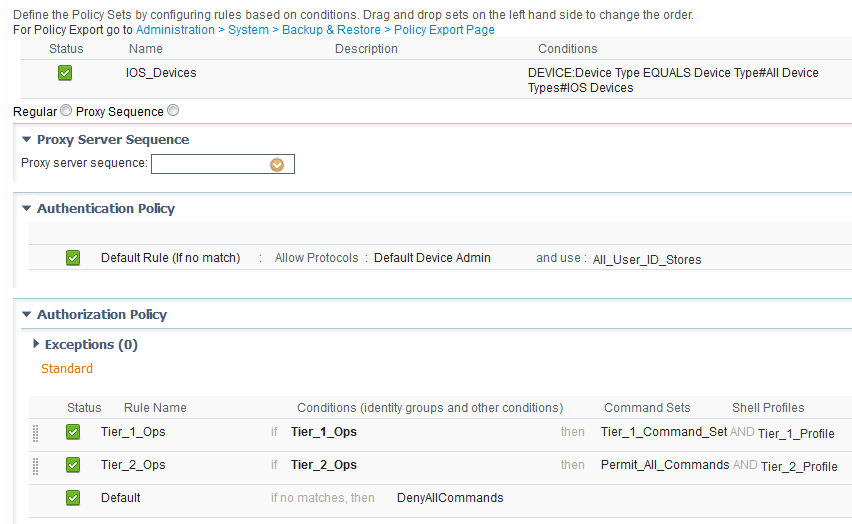
First, it means that the policies themselves can remain really clean and tidy because a given policy set is only responsible for either network access or device admin and never both. This keeps policies simple and makes them easier to understand, too.
Next, since the device admin policy is its own policy set and since policy sets have their own authc policies, the identity source used for device admin authentication can be customized separately from the network access identity source. What this means is that TACACS+ users can be in a separate database from network access users. TACACS+ users could be in an LDAP store, the local ISE database, or even another TACACS+ server.
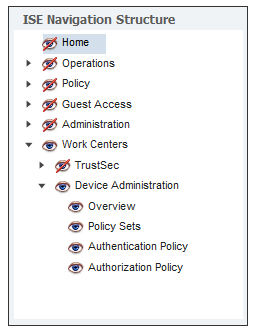
Thirdly, since device admin is its own policy set under the Device Admin work center, it means that Role-Based Access Control (RBAC) can be used to grant/deny access to the Device Admin area of ISE separately from other areas of ISE. This means there can be separate administrators for device admin and for network access policies and settings.
4 - Device Admin Policies Set Command Policies and Shell Profiles⌗
The result of a successful authentication and authorization of a user via TACACS+ is the application of a command set and/or shell profile to that user's login session.
A command set is a list of commands that the user is allowed or not allowed to run. ISE supports wildcard and regex matching of commands.
- Wildcard is used to match the command. eg,
sh*will match if the user typesshorshow - Regex is used to match the command arguments. eg,
interface ethernet 0 [1-3]will matchethernet0/1but notethernet0/0(Note the regex doesn't use theethX/Yformat but useseth X Y)

5 - Device Administration Runs As Its Own Service⌗
Device Admin functionality is only available after the Device Admin service is enabled. The service is not enabled by default. This is a good thing since if you're not using TACACS+, no resources are needlessly consumed on your ISE nodes.

The Device Admin service is enabled under Administration > Deployment > *Node Name* > Enable Device Admin Service.
The service should be enabled on the PSNs in your deployment that will be handling TACACS+ requests.
Disclaimer: The opinions and information expressed in this blog article are my own and not necessarily those of Cisco Systems.